
Remove a Patch from Your Backpack Easily | Patch Removal Guide (August 2023)
When it comes to backpack customization, patches have become a popular way to personalize your backpack and showcase your style. However, there may come a time when you want to remove a patch from your backpack, either to replace it with a new one or to restore the original look. In this article, we will guide you through the process of safely removing a patch from a backpack without causing any damage.
Gathering the necessary tools
Before you begin the patch removal process, it’s important to gather the following tools:
- Heat source (hairdryer or heat gun)
- Adhesive remover or rubbing alcohol
- Clean cloth or sponge
- Mild detergent
- Soft brush or toothbrush
- Soft towel
- Optional: Patch or fabric to cover the removed area
Preparing the backpack
- Empty the backpack: Start by removing all the contents from your backpack. This will make it easier to work with and prevent any damage to the items inside.
- Check the care instructions: Before applying any heat or cleaning agents, check the care instructions provided by the backpack manufacturer. Some backpacks may have specific recommendations or restrictions when it comes to patch removal.
Removing the patch
- Apply heat: Use a hairdryer or heat gun on a low setting to warm up the patch and the adhesive underneath. Keep the heat source moving to avoid concentrating the heat in one spot for too long.
- Peel off the patch: Once the adhesive has softened, gently peel off the patch starting from one corner. Use your fingers or a pair of tweezers to lift the edges of the patch and continue peeling until it is completely removed.
- Remove adhesive residue: If there is any remaining adhesive on the backpack, apply a small amount of adhesive remover or rubbing alcohol to a clean cloth or sponge. Gently rub the affected area in a circular motion until the adhesive residue is dissolved.
Cleaning the backpack
- Mix a solution: Fill a basin or sink with warm water and add a mild detergent. Mix the solution until it creates a soapy mixture.
- Clean the patch area: Dip a soft brush or toothbrush into the soapy water and gently scrub the patch area to remove any dirt or residue. Be careful not to scrub too hard, as it may damage the backpack material.
- Rinse and dry: Rinse the backpack with clean water to remove the soap, and then pat it dry with a soft towel. Hang the backpack in a well-ventilated area and allow it to air dry completely before proceeding.
Restoring the backpack
- Patch or cover the area (optional): If you wish to cover the spot where the patch was removed, you can either apply a new patch or use a fabric swatch that matches your backpack. Ensure that the new patch or fabric is securely attached to the backpack.
- Customize your backpack: Now that the patch has been removed, you have a clean canvas to add new patches or personalize your backpack in different ways. Get creative and showcase your unique style!
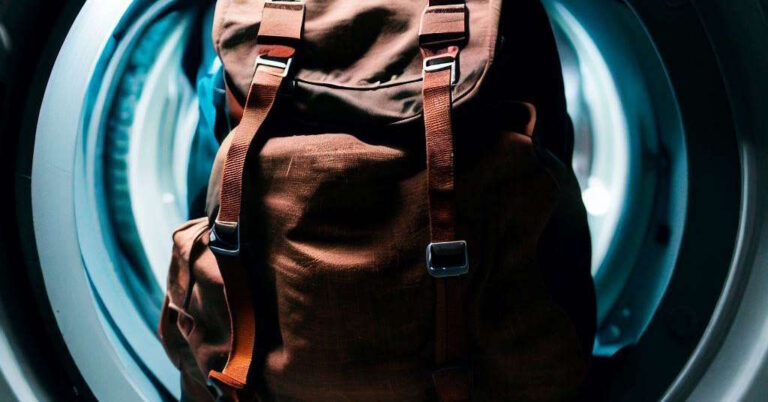
Can I wash a backpack
Yes, you can wash a backpack. However, it is essential to check the care label or specific instructions for your backpack model before attempting to clean it. Hand washing with mild detergent and water is generally a safe method for most backpacks. Avoid machine washing or using harsh chemicals that could damage the materials. Additionally, remember to empty the backpack and spot clean any stains before washing. Always allow the backpack to air dry completely before using or storing it to prevent mold or mildew growth.
End Note
Removing a patch from a backpack is a straightforward process that requires some patience and the right tools. By following the steps outlined in this article, you can safely remove a patch from your backpack without causing any damage. Remember to always check the care instructions provided by the manufacturer and take proper care of your backpack to ensure its longevity.
FAQs
Q1: Can I use a heat source other than a hairdryer or heat gun?
Yes, you can use other heat sources such as an iron on a low setting or a clothes steamer. However, make sure to keep the heat at a safe distance and avoid direct contact with the backpack to prevent any damage.
Q2: Will removing a patch leave visible marks on my backpack?
In some cases, removing a patch may leave behind a faint outline or adhesive residue. However, following the cleaning steps mentioned in this article should help minimize any visible marks.
Q3: Can I reuse the patch after removing it?
It depends on the type of patch and adhesive used. Some patches can be reattached using fabric glue or double-sided adhesive, while others may lose their adhesive properties after removal.
Q4: Is it necessary to clean the backpack after removing a patch?
Cleaning the backpack after patch removal is recommended to ensure that any adhesive residue or dirt is completely removed. This will help maintain the overall appearance and cleanliness of your backpack.
Q5: How long does it take for the backpack to air dry?
The drying time can vary depending on the material of your backpack and the surrounding environment. It is advisable to allow the backpack to air dry for at least 24 hours to ensure it is completely dry before use.